
Your first battle
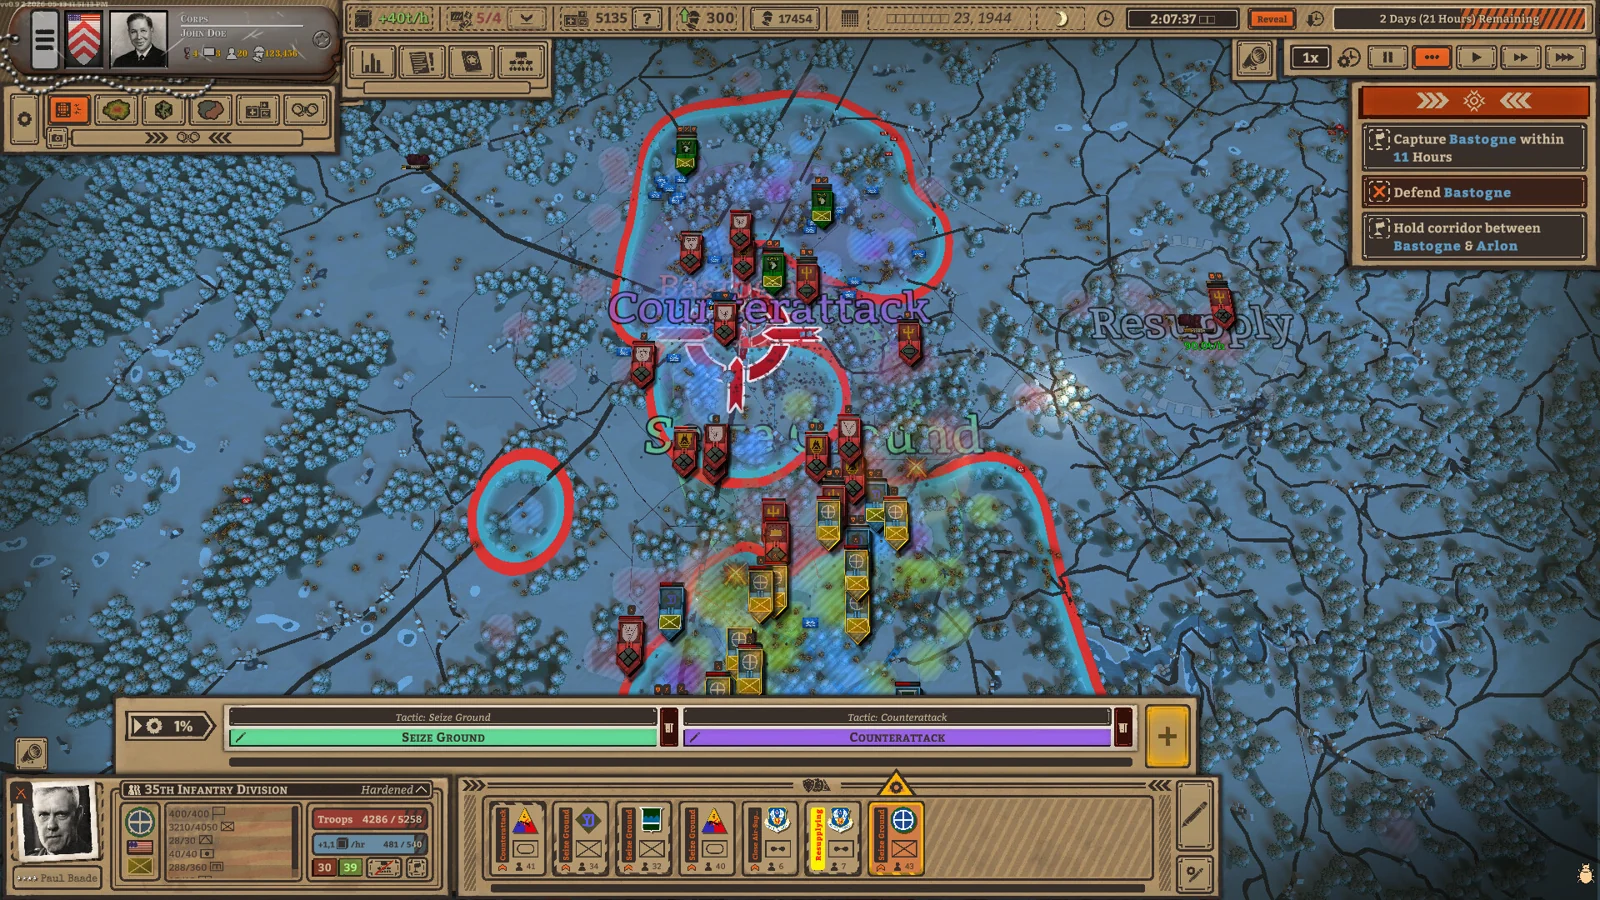
Begin with one objective, a protected supply route and a reserve. Check individual companies before extending the plan.
Battleplan asks you to think about the job of a formation before its next movement. A promising attack can fail because the wrong battalions are assigned, the approach exposes a flank or the division's supply route is too slow. This guide gives you a repeatable way to inspect those problems and build a smaller, more understandable plan.
1. Read the mission before drawing an arrow
First separate the place you want to reach from the condition that actually wins the mission. A town might be a required objective, a useful road junction or merely a tempting landmark. Read the briefing and objective panel, then identify which locations you must capture, which you must retain and whether the operation has a time constraint. Do not assume that destroying the largest visible enemy group is the victory condition.
Write the immediate task in one sentence: hold a crossing, secure an approach or take an objective without exposing the supply route. This prevents several unrelated movements from competing for the same troops. If the mission has several objectives, pick a first phase and decide what must remain protected while that phase runs. The eventual destination can wait until the route to it is workable.
Before making changes, look at the force already deployed. Ask which formation is closest to the first task, which can support it and which should remain available if the enemy moves somewhere else. A reserve does not have to look impressive on the map to be useful. It needs a clear job and a route to that job. Sending everything forward removes the ability to recover from an unexpected threat.
A useful first-pass map check
- Mark the objective and the route you expect the main force to use.
- Identify a vulnerable flank and a place where movement could become crowded.
- Find the division headquarters and the depot supporting that division.
- Identify a fallback position that still protects something important.
- Decide which formation can respond if the plan stops working.
These checks are a planning aid, not an instruction to redraw every mission into the same shape. A defensive scenario may demand patience; an offensive one may demand concentration. Know what your movements are supposed to achieve before execution begins.
2. Learn the command chain you are using
Read a formation from its headquarters down to the companies that will do the fighting. The names on the map can conceal a mixture of roles and conditions. Two battalions that look similar at a distance may have different support, supply and work to do. Inspect the formation panel before treating them as interchangeable blocks of strength.
Think of the command chain as the answer to three questions: who owns this task, which subunits will perform it and where should the supporting headquarters be? If you cannot answer those questions, simplify the order. A broad instruction applied to a formation can include units you intended to leave behind. Conversely, moving a few individual units may leave the rest of the formation following a different plan.
This is also why army construction matters before deployment. A collection of individually useful companies can still be awkward to command if their regimental groups do not match your battlefield tasks. Keep the initial formation understandable while learning. Change its organisation when you can name the problem the change will solve, rather than because the roster offers another purchase.
Check the selected formation twice
Before confirming an order, look at the selected unit or headquarters, then at the highlighted assigned subunits. Make sure the troops near the intended sector are the troops receiving the task. This is useful when several formations overlap on the map. A mistake in assignment can resemble bad movement behaviour even though the wrong part of the army is simply trying to execute the order.
If a formation's behaviour suddenly changes, inspect its headquarters and leadership as well as its frontline units. The developer's officer diary describes consequences when headquarters officers are incapacitated. That does not establish the cause of every stationary-unit report. It gives you one concrete condition to inspect before assuming a control has failed.
3. Separate preparation from the attack
An attack plan needs an approach, a point of commitment and a position from which to continue or stop. Drawing a long movement through all three can make the operation difficult to read. For a learning exercise, choose one limited objective and divide the reasoning into preparation, action and consolidation. You do not need a complicated order sequence to make those phases explicit in your own thinking.
During preparation, ask whether the attacking elements can reach a useful starting position without leaving the defending force unsupported. During the action, ask whether support is helping the actual contact area. During consolidation, ask what will protect the ground gained and how the next movement will be supplied. A plan that has only an attack phase tends to become a chase as soon as the enemy gives ground.
The plan should also have a stopping condition. That can be securing the selected objective, meeting resistance the assigned force cannot sensibly overcome or discovering that the approach exposes an essential route. Stopping to revise the plan is different from abandoning the mission. It keeps the next decision connected to the battlefield you now have rather than the battlefield you imagined at the start.
Avoid an unnecessarily long first operation
Suppose an infantry formation must clear an approach to a town. A manageable first task is to gain the approach while another element protects the side route. The next task is decided after inspecting the resulting position. Sending the same force through the approach, town and far-side junction in one commitment gives you more movement to diagnose and fewer clear moments to ask whether the original assumptions still hold.
This example is deliberately generic. It does not claim a particular town, unit count or timing will win a scenario. Use it to reduce the number of decisions happening at once. When you can explain why a short operation succeeds or fails, you are better placed to join several short operations into a larger plan.
4. Choose zone behaviour deliberately
The optional zone-order system gives formations an area and a tactical behaviour. Treat the zone as a job description rather than a coloured claim over territory. The zone orders guide explains the difference between an aggressive advance and a more cautious hold, how to reshape a sector and how to check the assigned battalions.
For a first plan, give each sector a purpose you can state without looking at its colour. One sector might protect an approach; another might carry the main advance. If both have the same purpose, ask whether they need to be separate. If one sector has several incompatible purposes, ask whether it is too large or has the wrong allocation. This makes later corrections easier because you know which job has failed.
Do not take a favourable prediction as permission to ignore the map. A prediction describes the displayed conditions, not every future enemy movement. Compare it with the force allocation, approach and route behind the zone. If the result surprises you, inspect which troops and terrain are included before treating the display as a simple strength ratio.
When to reduce a sector
Try a smaller sector when you cannot explain where its assigned battalions should concentrate, or when its edges extend into ground you do not intend to defend. Reducing the area is useful only if the smaller task remains relevant to the mission. Do not create a neat-looking zone that avoids the actual objective. Shape and purpose need to agree.
5. Inspect terrain at the point of contact
Zooming out helps you see an operation; zooming in helps you understand where it may fail. Look at the ground the enemy must cross, the ground your force will occupy and the routes connecting those positions. A location that looks convenient on the broad map may be awkward when you examine its approach and frontage. Use the elevation view when height is part of the decision.
Rather than memorising a single rule such as always taking the nearest town, compare alternatives. Which position lets the force perform its task while keeping support connected? Which exposes fewer unnecessary approaches? Which gives the reserve a usable route? The defence guide develops this comparison for holding a line, including when giving ground can shorten the frontage.
For an attack, distinguish the target's position from the ground you must cross to reach it. Strong support does not erase a poor approach. If the plan repeatedly stalls before contact, review the approach and allocation before adding forces to the same crowded location. If it stalls after contact, inspect the fight, assigned task and condition of the involved units.
Use a terrain question, not a terrain slogan
Instead of deciding every high point must be occupied, ask what that particular position helps you observe or protect. Instead of deciding every road is the best attack route, ask whether using it exposes the supply corridor or concentrates too many movements in one place. A good terrain decision serves the operation; it is not a separate collection of attractive places on the map.
6. Check supply before the force runs dry
Supply is part of the route to the objective. The developer describes a chain involving a source hub, a depot and the division headquarters. The relevant transfer depends on the route to that headquarters, while individual companies can have different supply conditions. The full supply guide explains how to trace the chain without confusing a stored depot total with successful delivery.
For a beginner's inspection, pick a company involved in the next task and look at its condition. Then locate its division headquarters and supporting depot. Ask whether the intended advance will make that relationship harder to maintain. If you do not know what the formation is consuming or receiving, a healthy-looking total elsewhere on the screen should not settle the question.
Build a supply check into the transition between phases. Before extending the operation, compare the new frontline with the headquarters and depot positions. An advance can create a longer route even when no enemy has cut it. It can leave a corridor with friendly units at its ends but little protection along its sides. The next objective is not the only thing that changes when the map opens up.
Diagnose one weak unit first
If several units look unhealthy, start with one clearly affected company instead of trying to repair the entire army at once. Identify its parent formation, current job and supply relationship. Once you understand that case, check whether other affected companies share the same parent or route. This helps distinguish a local demand problem from a formation-wide route problem.
Do not invent a universal distance at which supply stops working. Check the displayed state in your build. The useful question is whether the force receives what its current activity requires, not whether it is within a distance remembered from another game.
7. Give each supporting role a moment to matter
Support works best when you can name the obstacle it helps overcome. Reconnaissance can inform the choice of approach. Engineers can help with prepared positions or mines. Artillery and aircraft can create an opportunity the ground force still has to use. The combined arms guide explains how to think about these roles without reducing them to a pile of identical bonuses.
A useful planning exercise is to describe the attack in verbs: locate, prepare, advance, secure. Then assign a role to each verb. If the plan contains support with no clear place in that sequence, ask whether it is needed for this task or should be available elsewhere. If the plan has a necessary verb with no supporting role, that is a more meaningful gap than simply having fewer unit types.
Timing matters because a support action and a ground movement are not automatically the same event. Check whether the attacking formation is ready to use the opportunity you intend to create. If it is still reorganising or approaching, reconsider the sequence. This is a suggestion for coordinating the plan, not a claim about an exact number of minutes that guarantees success.
Keep support connected to the contact area
As the force moves, reassess where the support is relevant. The original concentration point may no longer be the point of contact. Do not keep repeating an old support plan simply because it was useful at the start. Equally, do not drag every supporting element into the first exposed position just to keep the map compact. Relevance and safety both matter.
8. Observe before issuing a replacement plan
When the result differs from what you expected, record the first visible difference. Did the wrong formation move? Did the right formation move to the wrong area? Did it reach the correct area but fail to make progress? These are different problems. Replacing the whole plan without identifying the difference removes the evidence you need to learn from it.
Inspect the active task, allocation and unit condition together. Movement alone does not prove the plan is working, and stationary units do not automatically prove it is broken. A unit may be performing a holding task, waiting within a sequence or unable to continue under its current conditions. The interface and your installed tutorial remain the authority for the exact state.
Make one purposeful change when the situation permits. For example, correct an assignment before also changing the sector, support and headquarters position. If several changes are urgent, make them, but acknowledge that the result will be harder to attribute. The point is not to turn a battle into a laboratory. It is to avoid creating a new problem while solving an unidentified one.
Use this troubleshooting order
| What you see | First inspection | Useful next question |
|---|---|---|
| A force does not go where expected | Selected formation and active task | Did the intended subunits receive the order? |
| A sector keeps extending forward | Zone tactic and boundary | Is that sector meant to advance or hold? |
| A depot has stock but troops look depleted | Company, parent division and HQ route | Is delivery keeping up with this task? |
| An attack gathers in one place | Sector shape and allocation | Does the task give the force a workable frontage? |
| A line collapses locally | Threatened approach and reserve route | Can the reserve intervene without uncovering another route? |
| Behaviour changes after an HQ loss | Headquarters and officer status | Is leadership disruption affecting the formation? |
9. Treat demo problems as demo problems
Players have reported confusing order behaviour and supply displays in public builds. Those reports are useful prompts for what to inspect; they are not proof that the announced release has the same defect. If an order remains unexplained after checking selection, mode, active task, supply and leadership, preserve enough information to report it through the game's support route.
Include the installed version, scenario, selected formation and sequence that led to the problem. Explain what you expected and what happened instead. If the game supports supplying a save with a report, follow the developer's instructions. Avoid claiming that a reload, newly drawn order or different depot position is a guaranteed fix unless a current official answer establishes it.
Older previews can describe controls that changed later. A 2025 preview discussed distinct planning modes, while later developer material introduced optional zone orders. Use those accounts to understand the game's direction, not to override the controls in front of you. Check the build's settings and tutorial when deciding how and when you can edit a plan.
10. Review the operation, not just the result
After a short operation, compare the outcome with the initial task. Did the force gain the intended ground? Did it keep the protected route? Is it in a useful position for the next phase? A successful capture with an exhausted or isolated formation may demand consolidation before another advance. A failed capture may tell you that the approach worked but the contact plan did not.
Choose one lesson you can apply next time. Examples include checking assigned battalions before execution, leaving a reserve route open or inspecting a company's supply before extending a zone. These are more useful than concluding that the entire army was weak. A specific lesson gives the next attempt a specific change and a result you can recognise.
If you replay a mission to learn, keep one part of the plan stable. Change the first objective, allocation or support sequence deliberately and compare the difference. Do not compare two completely different armies and operations as though they isolate one cause. The aim is to become more confident in your decisions, not to establish a universal best opening.
11. Work through a stalled-advance example
Imagine a formation has reached the edge of its assigned area but has stopped making useful progress. Begin by asking whether the task has actually finished. A force that reached the intended boundary may need a new decision rather than a repair. Compare the boundary with the objective and decide whether you expected more than the order asked for.
If the task is unfinished, inspect allocation next. Are the intended battalions present and involved, or are some still approaching from elsewhere? Then inspect one participating company's state and the contact area. This sequence gives you specific possible explanations instead of the vague conclusion that the whole system is unresponsive. It also stops you from drawing a longer order before understanding the shorter one.
Now decide on the smallest useful intervention. Correct an assignment if the wrong force owns the task. Review the support plan if the right force cannot overcome the contact. Reconsider the next phase if the first phase has already achieved what it was meant to achieve. These are distinct decisions even when the visible symptom is the same: an arrow on the map and troops that are not advancing as you expected.
Finally, note what changed after the intervention. If there is still no explanation, keep the original information for a support report. Do not turn this illustrative exercise into a claimed workaround for a specific bug. Its purpose is to help you recognise which part of the operation needs attention and which questions remain unanswered.
A compact routine for your next battle
- Read the objective and identify what must stay protected.
- Select the formation that owns the first task; inspect its subunits.
- Check the approach, division headquarters and depot relationship.
- Give the main sector a clear purpose and deliberate tactic.
- Connect support to the obstacle and keep a usable reserve.
- Watch the first difference between expectation and result.
- Inspect the cause before replacing the plan.
- Consolidate the new position before extending the operation.
For detail, choose the guide matching your next decision: orders, supply, army construction, combined arms or defence.
Further reading
The official game listing identifies the game and editions. Slitherine's launch overview describes the planned campaign. For a dated outside perspective, Strategy and Wargaming's November 2025 preview discusses command readability in an earlier build. Its observations are not final-release patch notes.